Monday, April 14, 2008

Back to the Grind

Astoundingly enough, as some of you shrewd readers may have devised from the above title, I set to work on the RBS parts some more tonight, and this time a grinder was employed. I also used my Dremel with some new cutting wheels I bought. The cutting wheel came in VERY handy, and I imagine we'll see a lot more of its use in the future. The grinder I hope to get more use out of as well. I bought it used off of Ebay. It's an old Craftsman Commercial model exactly like the one my dad has had for my entire existence here on earth. His is at least 40 years old, so I'm figuring mine will NEVER die, and that's a nice thing in a hand tool. I'll have some pics up of some of this general grindy foolishness here before much longer.

Labels: ,

Wednesday, April 02, 2008

One Shaft = Two Chutes

Had a happy little surprise yesterday when I went to the shop to pick up my cut driveshaft and they told me it was only going to be twenty bucks! That was nice. Now I can spend the saved fifteen to twenty dollars from the estimate on the termite exterminator I just found out I'm going to need. I guess it's a good thing I started this project, because it got me back down in the back area of the basement where the damage is located. Wow - somehow I've summoned gratitude involving a termite problem. Weird.

Moving on to happier things, here is a shot of the cut drive shaft.

Cut driveshaft

Isn't it cool?! Look at my new long, straight rolling ball chutes! In the right chute you can see a piece of the inner balance tube still laying there. It had two bands of rubber around it securing it tightly within the shaft. The shop did a decent, if not exacting, job getting it sawed down for me. I knew this would be the case, that they were only using a bandsaw and the cut would not be exactly true, but I think the results will be fine for my purposes. So far, so good.

Later in the evening I attacked a not-so-fun portion of the project, the cleaning up of the axle shafts. They need cleaning in the literal sense of getting all the rust and dirt off of them, but they also need cleaning in the visual sense. There are two brackets on each tube that need to be cut off. One bracket is a coil spring pad. No biggie, three welds with my recprocating saw and we're done:

Axle spring pad removed

The other bracket, which you can see part of in the photo...not so easy. I looked at it closely last night, and my thought was, "Why did I decide this would be a good idea?" The bracket has a lengthy and substantial mounting point. It's going to take a lot more than three straight cuts to get it removed. If this were a shop job, there would be no sense in persuing it. It's going to be labor intensive, and in man-hours it would cost a lot more to strip it down than it would to just find something else. However, I want to use it just because I want to, so you get to follow along in future posts while I bang, cut, and chisel at it until it's removed. Maybe it's time for a cutting wheel. After the bracket is removed the whole thing will need cleaning with a wire wheel and degreaser (It's loaded with differential fluid inside the tubes - smells awesome.). Fun stuff!

Labels: ,

Monday, March 31, 2008

Shafted

Friday I stopped in at the welding shop down the street from where I work. As mentioned previously, I have a driveshaft out of an old Dodge Dart that should make for a couple of nice U-channels for the sculpture once it is cut in half lengthwise. They said they could do the job for probably fifteen bucks, which sounded fine to me. They also advised that it would save me a few bucks to cut off the ends of the shaft myself beforehand, which I knew wouldn't be a problem.

Last night I headed out to the garage, sawzall in one hand, camera in the other. I didn't figure there'd be much to photograph, but I know sometimes I find the unexpected in a project, so why not?
RBS Drive shaft dismantling

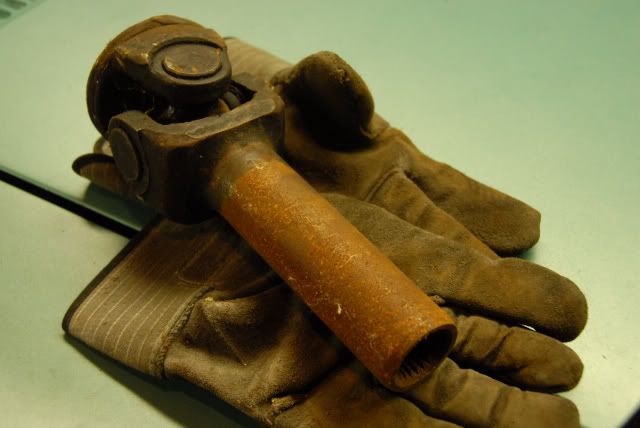
Here we have the dismembered front yoke for the drive shaft. I cut it close to the weld, so close, in fact, that I ended up cutting into some of the weld itself, slowing the job down a bit. Not really a problem overall, however, and I was pleased with the relatively quick job (as well as all the noise and smoke I was able to make with the sawzall). I was pleased, that is, until I looked at the drive shaft and saw this:
RBS Drive shaft dismantling

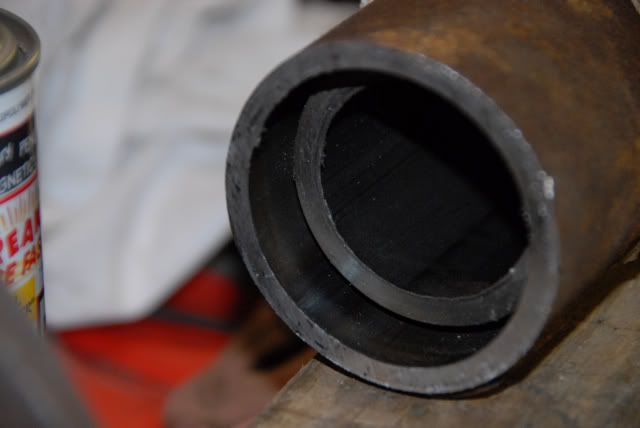
What? What is that? There's another shaft in my shaft?? Why is that made like that? I didn't know they made 'em that way! Shoot. Now how am I gonna - how is that going to affect cutting the shaft in two?

I looked at the shaft some more and it appears the second tube is held in place with a surrounding piece of rubber. I'm guessing it's a sort of elastic damper, but if you know any better, please feel free to enlighten me. This may surprise you, but I've never cut a driveshaft up before, so I've got a bit to learn.

In spite of the weirdness, I needed to carry on. It was growing late. I picked up the sawzall and went at the other end of the tube.
RBS Drive shaft dismantling

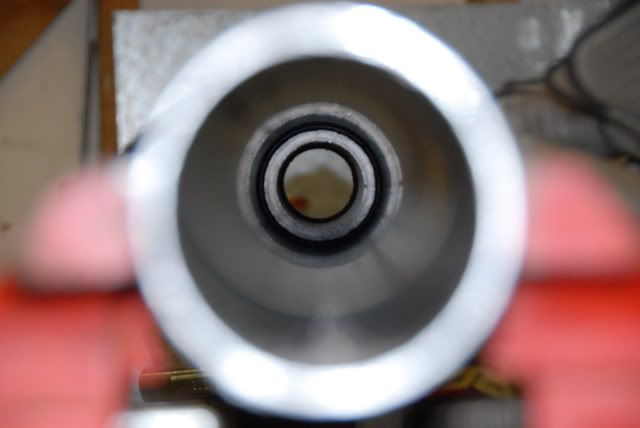
Here's a view down the shaft from the rear of things. Inside you can see the light ring where the inner tube is fixed at the far end of the shaft. I believe it's only about twelve to eighteen inches long. It's pretty stout stuff - about the thickness of water pipe.

I tried to think of a way to remove the inner tube, but my brain was pretty tired and nothing came to me. I put the shaft in the car and shut the lights out in the garage for the evening. I can only do so much thinking for one day, and my time was up.

Today I took the whittled-down shaft to the shop. Not great news. Apparently, it's not going to cost me fifteen bucks, but thirty-five or forty. I guess that inner tube adds to the labor involved. He said, "Well, do you want us to do it?" I said, "I need it done, and this is the only way I know how, so yeah."

I hope all my "cheap" ideas for this sculpture don't turn out being this expensive!

Labels: ,